1. Install Inkscapes
Windows computers:
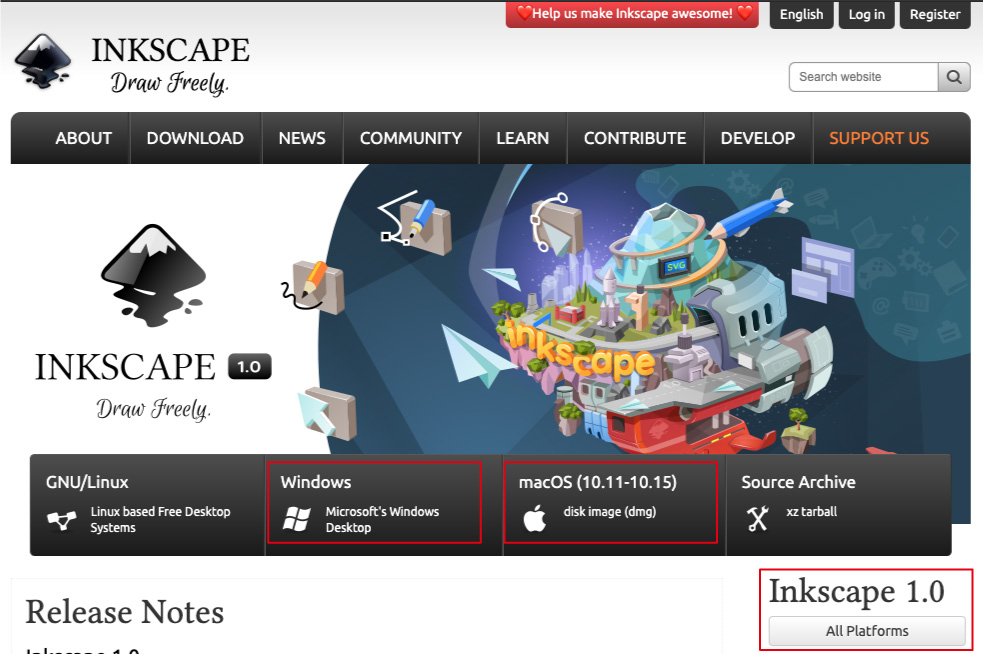
Download and install Inkscape
If you want Cubiio to engrave along the path of your drawings, you need to convert your drawings to G-code files. G-code files are script files that describe paths, speeds, and the max power of your drawings.
To generate G-code files, you need to do two things:
1. Create a Vector Graphic File (ex: .ai .cdr .dxf…etc.)
a. You can do it with your favorite software such as Illustrator, Corel Draw…etc.
b. If you don’t have any experience of vector graphics, we recommend “Inkscape”.*
c. Otherwise, there are plenty of galleries on line that allow you to download.
2. Convert Vector Graphics to G-code files
a. You can do it with your favorite software. Please check our supported command list.
b. If you don’t have any experience, follow our instructions about converting vector graphics to G-code files with Inkscape.
Inkscape is an open-source vector graphics editor similar to Adobe Illustrator, Corel Draw, Freehand, or Xara X. You can create vector graphics and convert them to G-code files with G-code extensions.
Template is provided by Quser SC Cheng / Resource
Please check our instructions below for more details.
Windows computers:
Download and install Inkscape
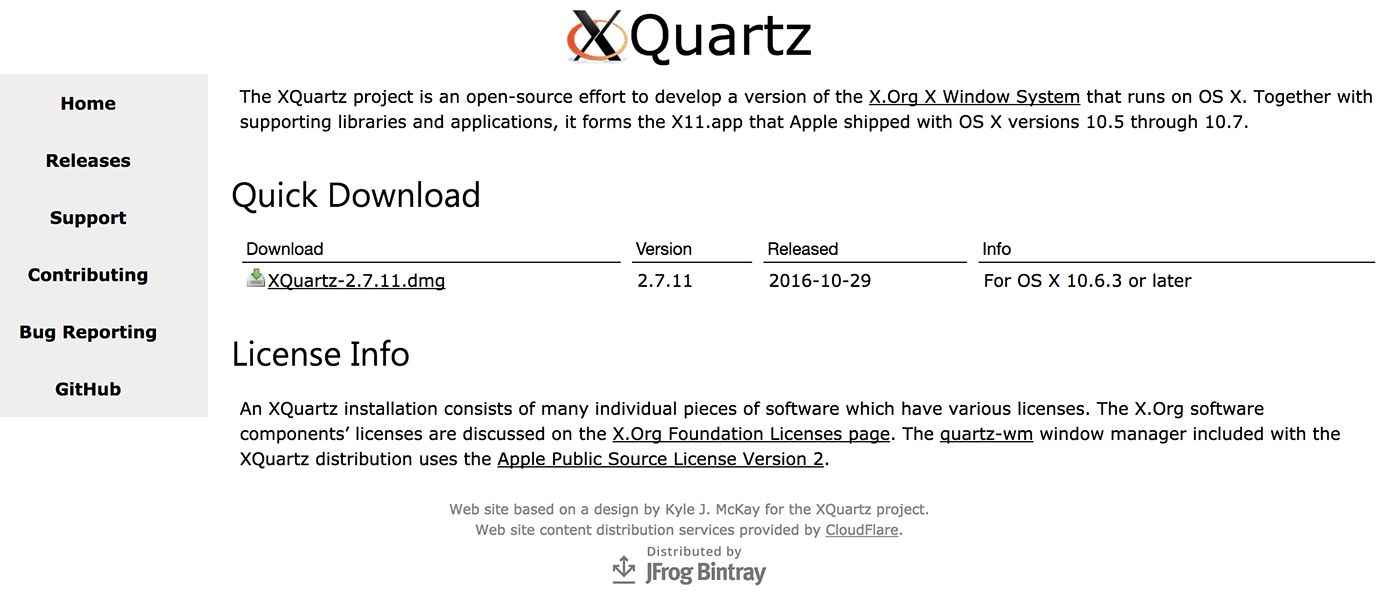
1. Download and install XQuartz
( Mac is using XQuartz to run Inkscape)
2. Restart your computer.
3. Install Inkscape and add Inkscape to your Applications folder. ( In case that your Mac blocks Inkspace, go to System Preference -> Security & privacy click the lock and then open the Inkscape).
4. Launch XQuartz ( it should be located in ~/Applications/Utilities ).
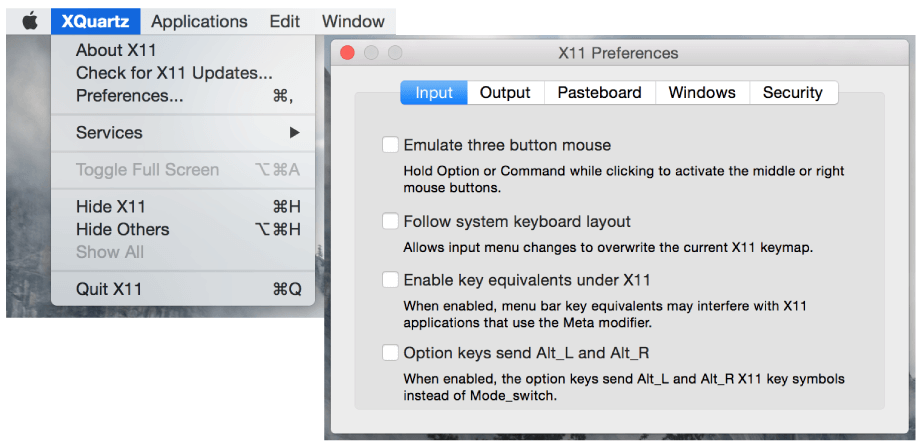
5. Enter Preferences… of XQuartz(X11)( top-left side corner of your desktop) -> ”Preferences…” -> ”input”, unselect all check boxes and then close the window.
6. Restart your computer to make settings effective.
7. Launch Inkspace. ( It may take several minutes. Please be patient. )
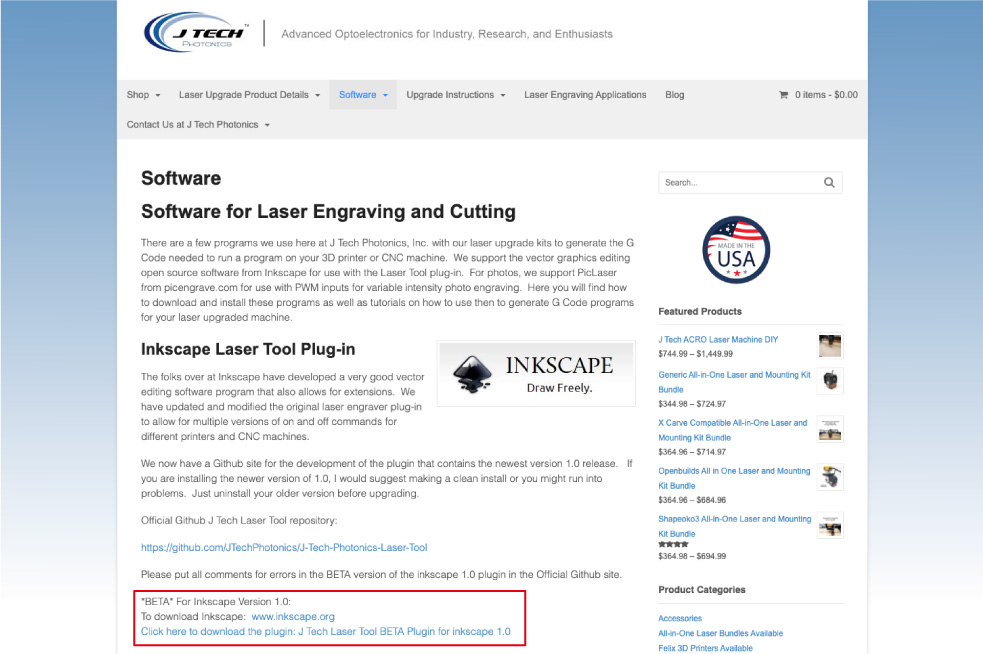
Download : J Tech Photonics Laser Tool
Quick Download : J Tech Photonics Laser Tool
This extension converts vector graphics in inkscape to G-Code files.
[ J Tech Photonics Laser Tool ]
Windows:
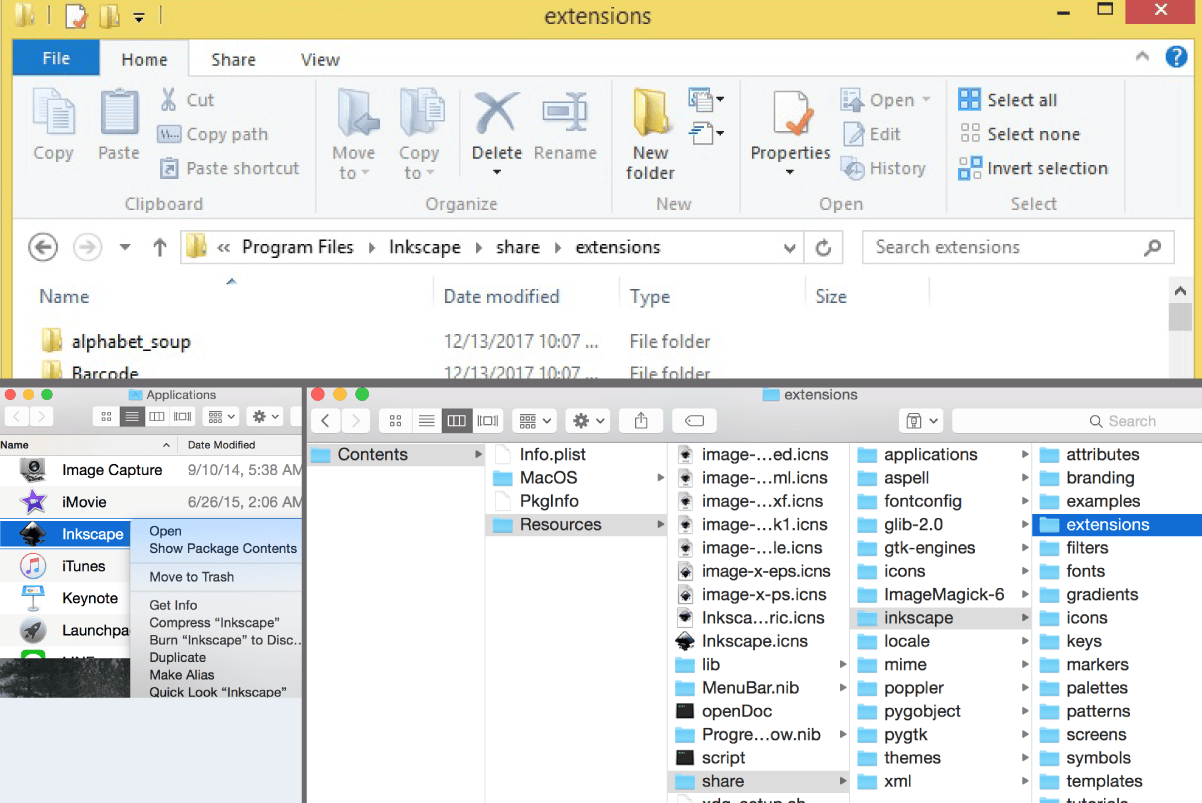
Unzip the file and put all of [ J Tech Photonics Laser Tool ] unzipped files in “C:\Program Files\Inkscape\share\extensions”
If you install in D drive or other folders, same with same as above
Ex: D drive “D:\Program Files\Inkscape\share\extensions”…etc.
Mac:
Unzip the file and right click on applications of Inkscape
Click the “Show package contents” and put all of [ J Tech Photonics Laser Tool ] unzipped files in /Applications/Inkscape.app/Contents/Resources/extensions
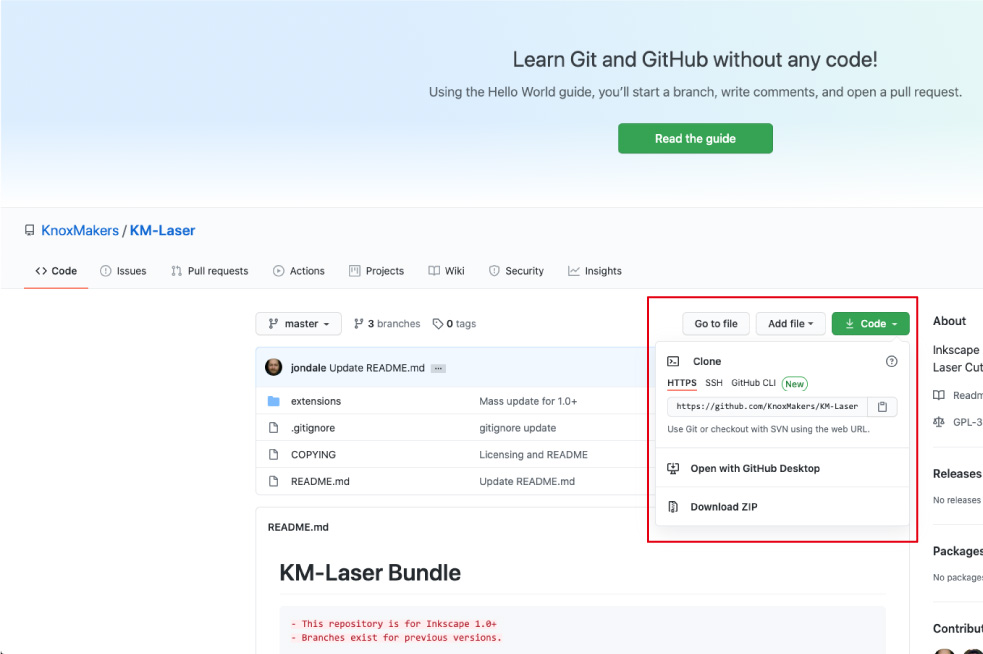
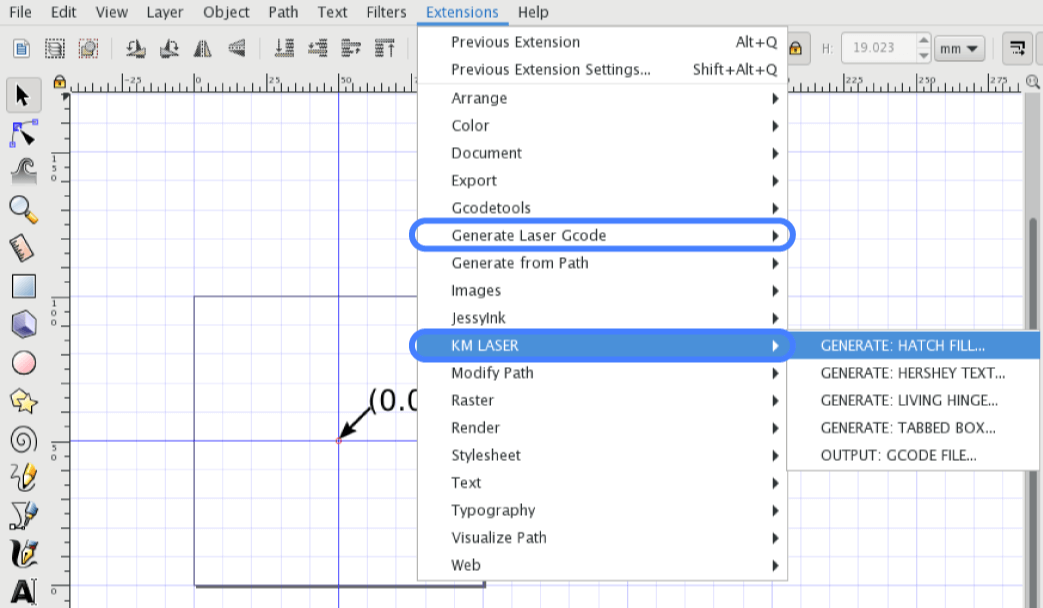
[ KM Laser ]
Windows:
1. Unzip the file and copy the contents in "extensions". Paste the files into C:\Program Files\Inkscape\share\extensions.
2. Copy the contents in "palettes". Paste the files into C:\Program Files\Inkscape\share\palettes.
Mac:
1. Unzip the file and copy the contents in "extensions". Paste the files into /Applications/Inkscape.app/Contents/Resources/extensions.
2. Copy the contents in "palettes". Paste the files into /Applications/Inkscape.app/Contents/Resources/palettes.
Restart Inkscape
Click the extensions menu and you should see Generate Laser G-code and KM LASER appear in the menu.
1. Download : cubiio_template.svg and open it.
(Template can show the border of Cubiio and assist you easily align the pictures.)
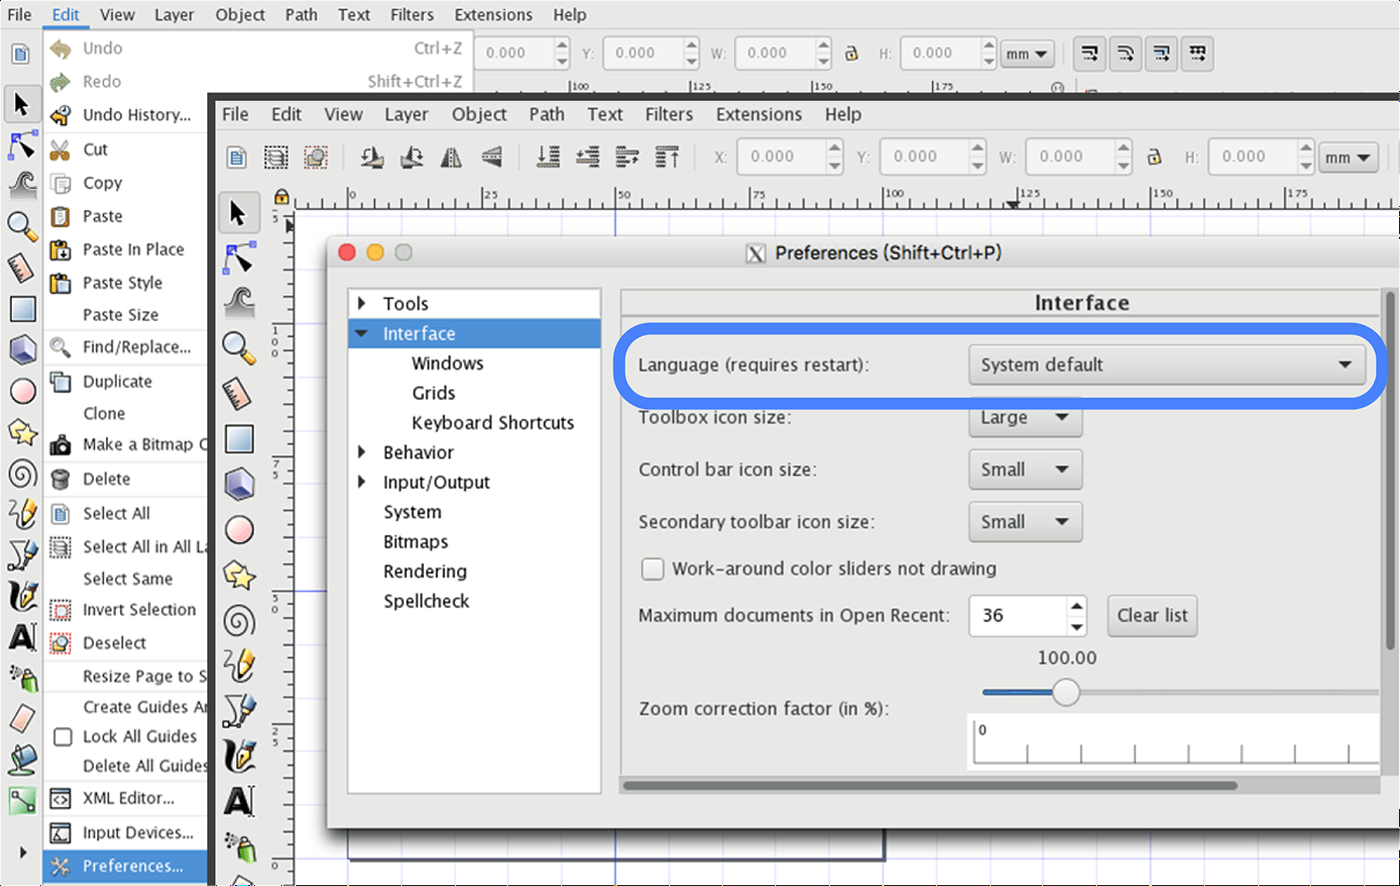
2. Setting Language:
Edit > Preferences
"Interface”>Language, and change to your preferred language.
You can create vector graphics in Inkscape or import vector graphics.
a. Create vector graphics in Inkscape
Please see official tutorials from Inkscape.
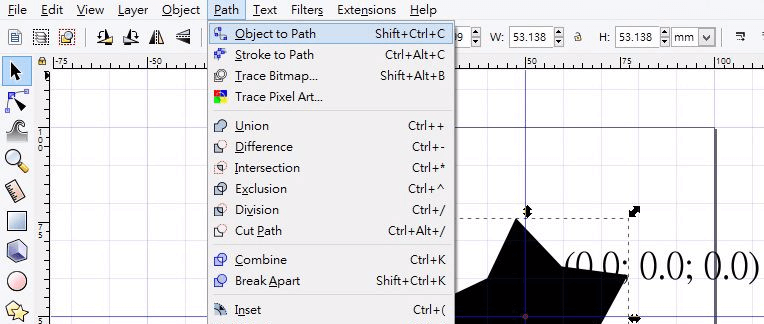
1. Select all the graphic
2. Path(P) -> Object to Path
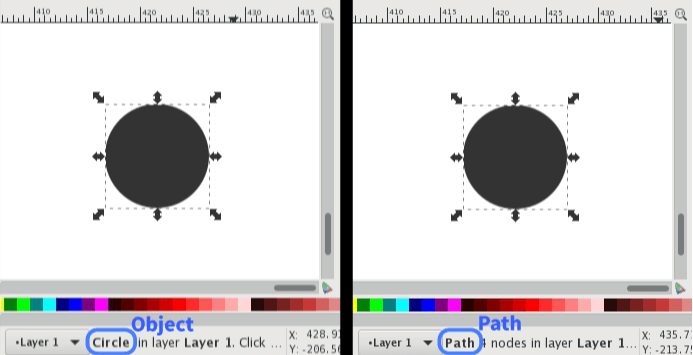
* There are 2 types of vector - object and path.
Objects use intelligent method to store the information and pathes are vectors defined by the positions.
For example: rectangles, circles, polygons, texts are objects; while free hand drawings and Bezier curves are pathes.
You can select the graphics and see the status bar below to distingusih the types.
The extensions we'd like to use (J Tech Photonics Laser Tool and KM-Laser) only operate on pathes, so be sure to transfer objects to pathes before applying the extentions.
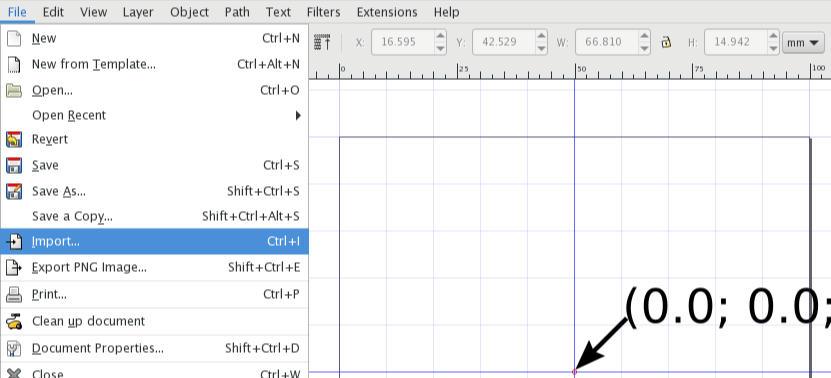
b. Import vector graphics
File -> Import ( the file must be a final art work. eg. .dxf, .ai, .cdr...etc )
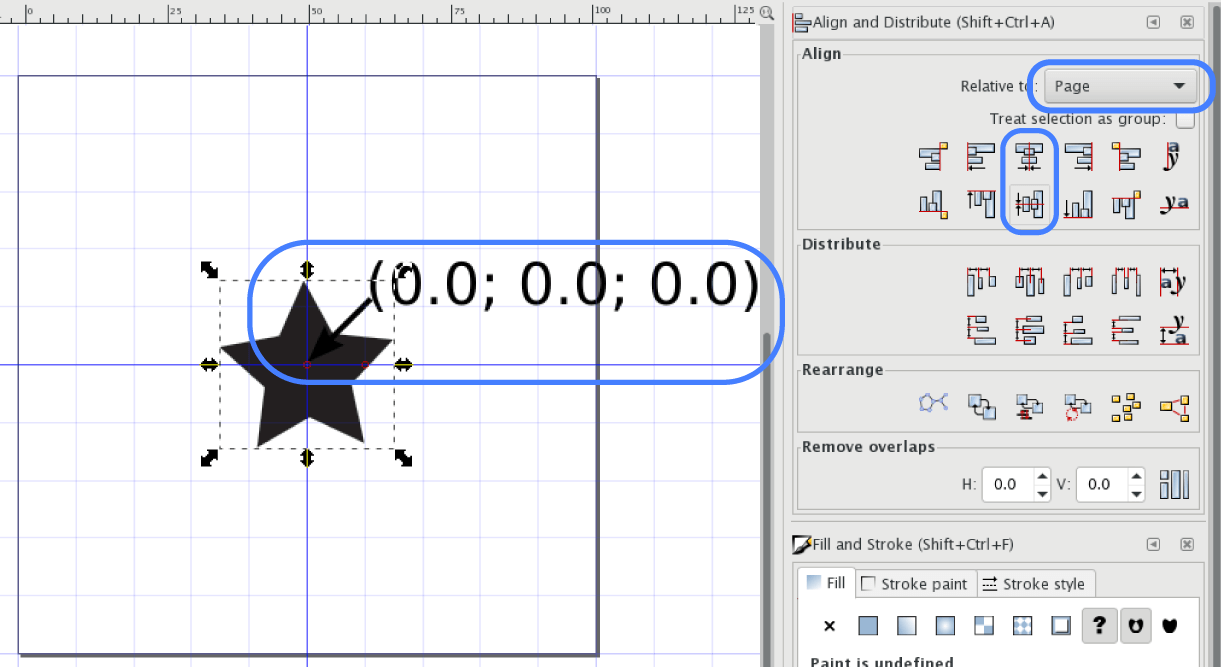
Align(shift+ctrl+A)
Selecting the design and then click the "horizontal axis" and "vertical axis" set it center.
(0.0;0.0;0.0) of the coordinate should be placed at the origin of cubiio which is defined at the center of the working space.
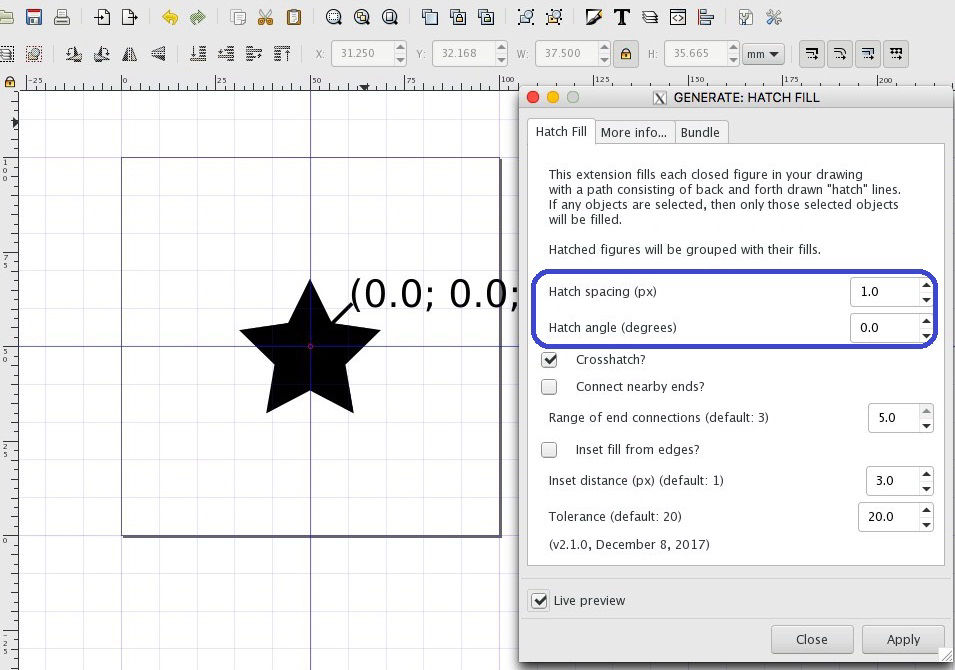
Extensions -> KM LASER -> GENERATE: HATCH FILL
1. Set filling parameters
Hatch angle (degrees) : 0.0
Hatch spacing : 1.0
2. Click the“Apply”.
The graphic will be changed to “Fluorescent blue”, and then close the dialog.
*Scaling operations change the filling spacing, so we recommend not to do any scaling operations after filling graphics.
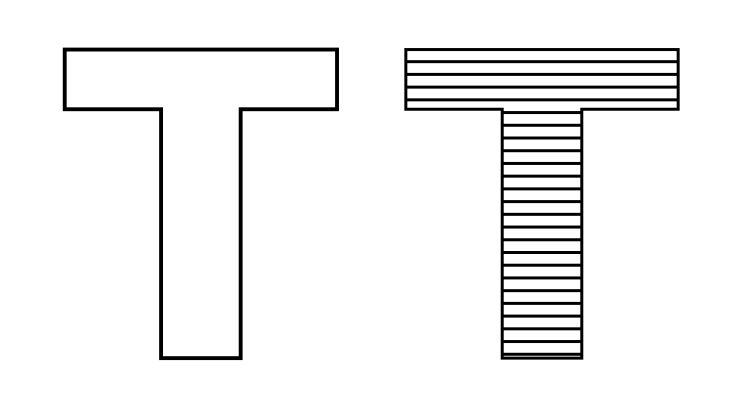
※For example
Engraving a star without filling : ☆
After using KM-Laser Hatch fill : ★
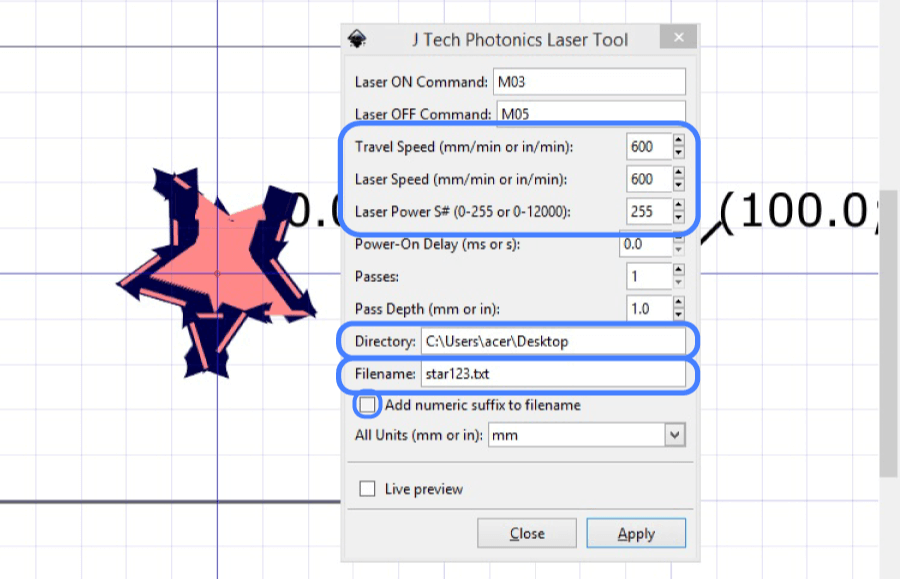
extensions -> Generate Laser G-code -> J Tech Photonics Laser Tool
1. Setting parameter
Laser ON Command : M03
Laser OFF Command : M05
Travel Speed : 600(the max of speed)
Laser Speed : 600(the max of speed)
Laser Power : 255(he max of power)
Suggestion: Setting the max power(255)/speed(600mm/min). You can adjust speed and power in the APP.
2. Directory
The output location is required. This is the folder that you want to save your output files
Ex: Desktop
Windows:
C:\User\[your user name]\Desktop
Mac :
/Users/[your user name]/Desktop
3. Filename
1. Change the file extension to .txt ( you might see .gcode for default )
2. Uncheck “Add numeric suffix to filename”.
*Filename may include number or english characters and should be less than 8 characters.
can’t use “~”
cubiio_1.txt (Y) correct
cu~biio123.txt (N) error.
The filename more than 8 characters and also include “~”
4. Click the“Apply” and you will see arrows appear on your drawing, it means you have finished your G-code file making.
5. You can close the dialog and delete the arrows.
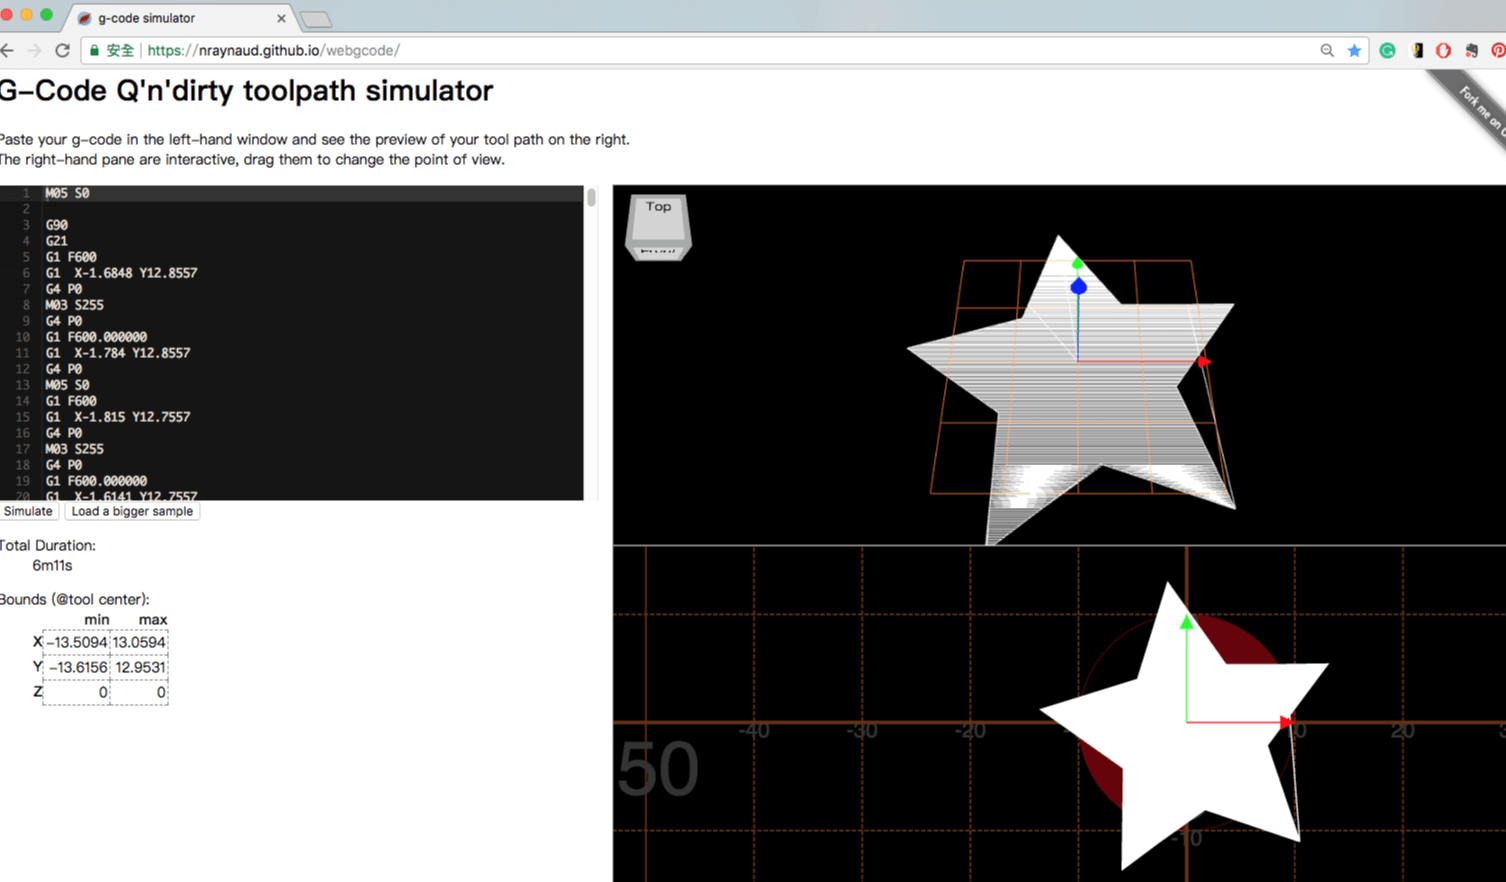
When graphics become complicated, it can save plenty of time that creators spend on try-and-error by previewing the working path of the graphics. G-Code Q'n'dirty toolpath simulator is a free online tool that provides essential functions for working path previewing.
G-Code Q'n'dirty toolpath simulator
It’s a simulation software, please paste your g-code in the black window and see the preview of your tooling path on the right.

Serviecs
Beginner's Guide
FAQ
Download
News
Contact:cubiio@muherz.com
Subscribe Cubiio E-letters to receive latest news and special offers.